How a Simple Timer and Counter Can Transform Your Electronics Projects with Eye-Catching Sequential Lighting
Have you ever watched those smooth, running lights on digital displays, music stages, or festive decorations and wondered, "How can I create this cool effect myself?" Whether you're a beginner tinkering with electronics or a maker looking for your next show-stopping project, building an LED chaser circuit using the classic 555 Timer IC and the CD4017 decade counter offers an irresistible mix of simplicity, creativity, and hands-on learning.
Why This Circuit Matters — More Than Just Blinking LEDs
The charm of an LED chaser lies in its deceptively simple brilliance: a row of LEDs that light up one after another, creating the illusion of motion — whether it's a classic "running lights" animation, a "Knight Rider" style forward-and-back effect, or a custom rhythm synced to music. These effects are not just decorative — they teach essential electronics concepts like timing circuits, pulse generation, and digital counting.
With just a couple of ICs and a handful of resistors, capacitors, and LEDs, you'll learn how:
- The 555 Timer generates steady clock pulses in astable mode
- The CD4017 counter steps through outputs with each pulse
- Each output controls an LED in sequence, crafting a captivating visual pattern
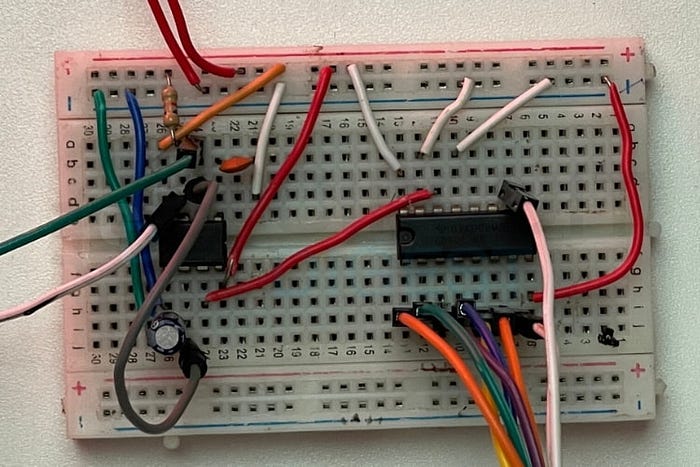
What You'll Need
One of the biggest advantages of this project is its accessibility — no expensive parts, no difficult soldering (unless you want a permanent panel), just a breadboard and standard components:
- 555 Timer IC — the brain that creates clock pulses
- CD4017 Decade Counter IC — steps through 10 output pins
- 10 LEDs + current-limiting resistors
- Resistors, potentiometer, capacitors
- 9V battery or 5–12V DC power supply
Because the component list is minimal and inexpensive, this makes it the perfect introductory build for hobbyists, students, and educators alike.
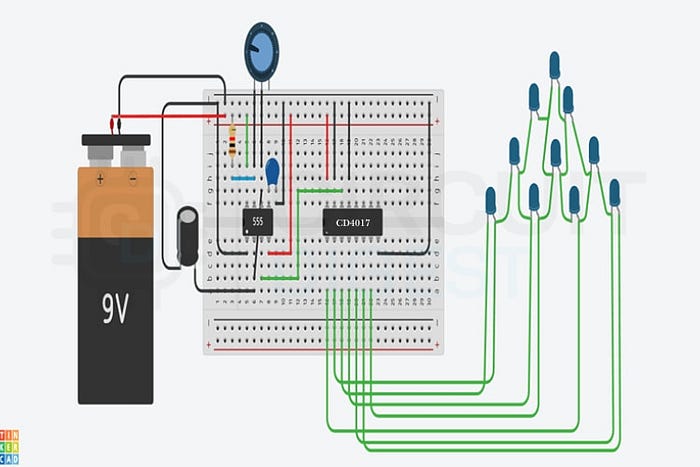
How It Works: From Pulses to Patterns
At its core, this circuit marries timing and sequencing:
- 555 Timer in Astable Mode — This classic chip produces a continuous stream of on/off pulses. Its speed is controlled by resistors and a potentiometer — twist the knob, and your lights zip faster or glide slower.
- CD4017 Counter — Each pulse from the 555 tells the CD4017 to move to the next output. That output goes HIGH, lighting one LED at a time, while all others stay OFF.
- Sequencing Made Visual — With 10 outputs, you get a smooth procession of lights — perfect for eye-catching effects.
The magic happens in the seamless handoff between timing and counting: one chip keeps tempo, the other keeps score.
Make It Yours: Tips, Tweaks & Creative Enhancements
Once you've built the basic chaser, the real fun begins:
✨ Speed Control: The potentiometer lets you dial the lighting tempo from slow sweeps to rapid blinks — perfect for mood lighting or sound-reactive sync. ✨ More LEDs = Bigger Impact: Fancy 20 or even 100 LEDs? You can cascade a second CD4017 to expand the sequence. ✨ Colour & Direction: Swap in RGB LEDs and add bidirectional chase patterns for a more dynamic show. ✨ Sync with Music: Add a simple preamp or mic circuit and make your lights dance to the beat!
Troubleshooting & Common Issues
Even simple circuits can have hiccups — but don't worry, most problems have straightforward solutions:
- LEDs not lighting? Double-check your power polarity and wiring.
- Dull LEDs? Make sure each has its own resistor to limit current.
- Sequence skipping or stuck? Ensure the 555 output is connected correctly to the CD4017 clock pin.
- Speed not responding? Check your potentiometer wiring and values.
A Perfect Project for Every Maker
Whether you're:
- Teaching electronics fundamentals,
- Building immersive holiday décor,
- Designing interactive displays,
- Or simply exploring hands-on DIY…
This LED chaser project ticks all the boxes: intuitive, inexpensive, versatile, and strikingly visual.
Ready to build it yourself? Dive into the detailed schematics and step-by-step build guide to bring your project to life!