Speculative decoding is one of the most effective inference optimization techniques available right now. The idea is elegant: a small draft model proposes several tokens ahead, and the main model verifies them all in a single forward pass. If the draft gets enough right, you get multiple tokens for the price of one verification step.
The catch is that nobody tells you how many tokens to draft.
Too few and you leave throughput on the table. Too many and you waste compute verifying tokens the draft model got wrong — the acceptance rate drops, and you end up slower than you started. Every model, hardware combination, and workload has a different sweet spot. The only way to find it is to measure.
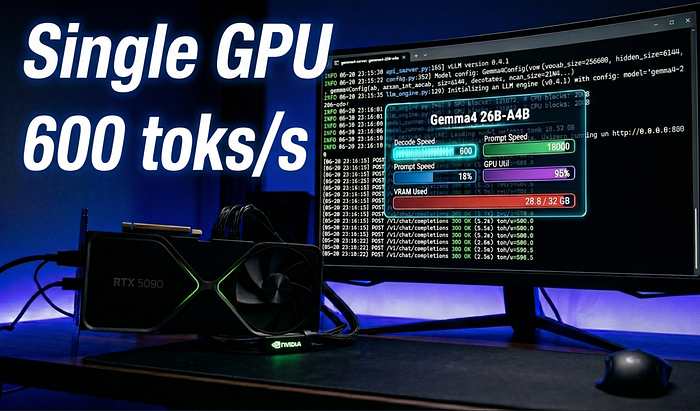
So I did. I ran a full automated sweep of every DFlash speculative token count from 0 to 15 on Gemma 4 26B, on a single RTX 5090. Here's everything I found.
The Setup
Hardware: RTX 5090, 32GB VRAM
Runtime: vLLM in a Conda environment
Main model: cyankiwi/gemma-4-26B-A4B-it-AWQ-4bit — the full 26B parameter model, quantized to AWQ 4-bit to fit within 32GB
Draft model: z-lab/gemma-4-26B-A4B-it-DFlash — a lightweight auxiliary network designed specifically for DFlash speculative decoding with Gemma 4
The DFlash draft model runs alongside the main model and proposes token candidates at each step. The main model then verifies or rejects each candidate in a single batched forward pass. Verification is significantly cheaper than generation, so even a 20–40% acceptance rate from the draft model translates into meaningful throughput gains.
Why DFlash Specifically
Standard speculative decoding uses a separate, smaller model of the same family — often a 2B or 7B variant — as the draft model. DFlash (Draft-Flash) is a variant where the draft network is architecturally optimized to be extremely fast while maintaining high token acceptance rates on the target model's distribution.
For Gemma 4 26B, the z-lab DFlash model is purpose-built for this pairing. You don't get that kind of acceptance rate optimization with a generic small model.
Baseline: No Speculative Decoding
Before touching any speculative decoding settings, I established a clean baseline with num_speculative_tokens=0. The four core flags define the server's resource ceiling and stay constant across every run:
vllm serve cyankiwi/gemma-4-26B-A4B-it-AWQ-4bit \
  --max-num-seqs 1 \
  --max-num-batched-tokens 4096 \
  --max-model-len 2048 \
  --kv-cache-dtype fp8
Baseline result: 228 output tokens per second, 4455 ms mean end-to-end latency.
This is the number to beat. Everything else is measured against it.
The Benchmark Methodology
The workload is intentionally simple and designed to be reproducible:
vllm bench serve \
  --dataset-name random \
  --random-input-len 256 \
  --random-output-len 1024 \
  --request-rate 1 \
  --max-concurrency 1 \
  --ignore-eos \  --temperature 0
A few design decisions worth explaining:
•Concurrency 1, request rate 1 — removes all scheduling noise. You're measuring raw generation throughput, not queuing behavior.•--ignore-eos — forces the model to generate exactly 1024 output tokens every time. Without this, early EOS tokens create variable-length outputs that make cross-run comparisons meaningless.•Temperature 0 — fully deterministic output. Eliminates sampling variance as a confound.•Random prompts, 256 input tokens — a controlled, repeatable prompt distribution that doesn't bias toward any particular vocabulary pattern.
The sweep script (remote_dflash_sweep.sh) starts vLLM, waits for /health to respond, runs the benchmark, saves the JSON results, kills the server, then increments the speculative token count and repeats. 16 full benchmark runs, one per setting.
The best candidates from the sweep then get a confirmation run with 20 prompts to filter out variance before drawing any conclusions.
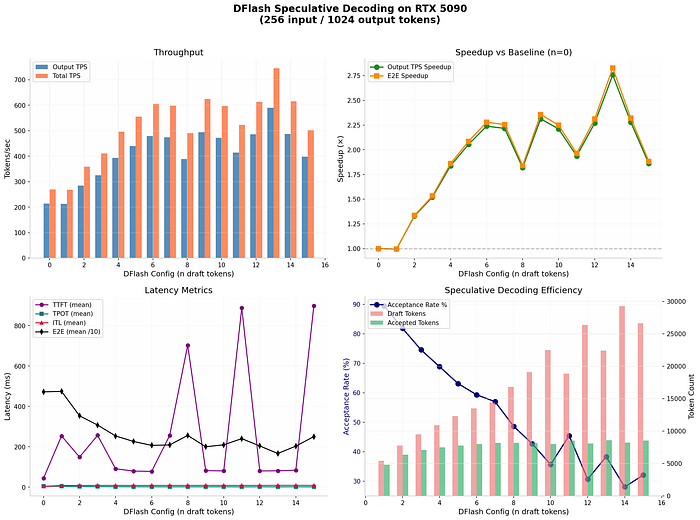
Full Sweep Results: n=0 to n=15
The sweep results told a clear story.
Gains build quickly from n=0 through roughly n=10, then the curve flattens and gets noisy. The peak average throughput in the first sweep landed at n=13, with 589 output tokens per second — about 2.83x over baseline.
But here's what the average throughput number hides: tail latency.
Average throughput tells you how fast things go when they go well. p95 latency tells you how bad your worst 5% of requests are. In any real serving scenario, your p95 is what users actually experience as "slow." Optimizing purely for average while ignoring tail latency is how you ship a server that looks great in benchmarks and feels broken in production.
Confirmation Run: Clean Numbers
The confirmation run with 20 prompts at temperature 0 gave us the verified numbers:
SettingThroughputMean LatencySpeedupBaseline (n=0)228 tok/s4455 ms1.0xDFlash n=13578 tok/s1707 ms2.56x
Both throughput and mean latency improved substantially. That's the ideal outcome — not a throughput-latency tradeoff, but a genuine improvement on both axes.
The Twist: p95 Latency and the Batch Budget
Here's where it gets interesting.
With max_num_batched_tokens=4096, n=13 had the best average throughput. But the p95 tail latency was rough:
Configp95 Latencyn=13 + max_num_batched_tokens=40963726 msn=13 + max_num_batched_tokens=81922565 ms
Bumping max_num_batched_tokens from 4096 to 8192 cut p95 latency by over 1100 ms — a 31% improvement — while keeping average throughput strong.
Why does this happen? The batch scheduling budget controls how many tokens vLLM can process in a single step. When you add speculative decoding, each step potentially involves verifying a batch of 13 candidate tokens on top of the normal prefill and decode work. With a budget of 4096, speculative batches occasionally get fragmented across multiple steps, which creates latency spikes at the tail. Doubling the budget to 8192 gives the scheduler room to handle speculative verification batches cleanly, which smooths out the tail without hurting the average.
The fix costs nothing. It's a single flag change.
The Production Config
After all of this, the setting I'd actually serve:
VLLM_USE_FLASHINFER_SAMPLER=0 vllm serve \
  cyankiwi/gemma-4-26B-A4B-it-AWQ-4bit \
  --speculative-config '{    "method": "dflash",    "model": "z-lab/gemma-4-26B-A4B-it-DFlash",    "num_speculative_tokens": 13,    "attention_backend": "flash_attn"  }' \
  --max-num-seqs 1 \
  --max-num-batched-tokens 8192 \
  --max-model-len 2048 \
  --gpu-memory-utilization 0.93 \
  --kv-cache-dtype fp8 \
  --trust-remote-code
A few notes on the flags:
VLLM_USE_FLASHINFER_SAMPLER=0— disables FlashInfer's sampler, which can conflict with DFlash's attention backendattention_backend: flash_attn— required for DFlash; FlashInfer backend is not compatiblegpu-memory-utilization 0.93— pushes memory usage close to the limit to maximize KV cache headroom for speculative batcheskv-cache-dtype fp8— FP8 KV cache cuts memory usage significantly, freeing room for both models to coexist on 32GB VRAM
Key Takeaways
1. The optimal speculative token count is not obvious. For Gemma 26B on an RTX 5090 with DFlash, it's 13. On a different model, different hardware, or a different workload shape, it will be something else. Always sweep.
2. Average throughput is not the whole story. n=13 with a 4096 batch budget looked great on average and had terrible p95 latency. If you're serving real users, you need to check both.
3. The batch scheduling budget matters as much as the token count. max_num_batched_tokens is not just a memory knob — it directly affects how cleanly the scheduler handles speculative verification batches. Underprovision it and you'll pay in tail latency.
4. The gains are real and significant. 2.56x throughput improvement with better mean latency on a single GPU, no model quality change, no extra hardware. If you're running Gemma 26B at any scale and haven't tried speculative decoding, this is the first optimization to reach for.
Resources
- DFlash draft model: z-lab/gemma-4–26B-A4B-it-DFlash[1]
- Main model (AWQ 4-bit): cyankiwi/gemma-4–26B-A4B-it-AWQ-4bit[2]
- vLLM documentation: docs.vllm.ai[3]
References
[1] z-lab/gemma-4-26B-A4B-it-DFlash: https://huggingface.co/z-lab/gemma-4-26B-A4B-it-DFlash
[2] cyankiwi/gemma-4-26B-A4B-it-AWQ-4bit: https://huggingface.co/cyankiwi/gemma-4-26B-A4B-it-AWQ-4bit
[3] docs.vllm.ai: https://docs.vllm.ai