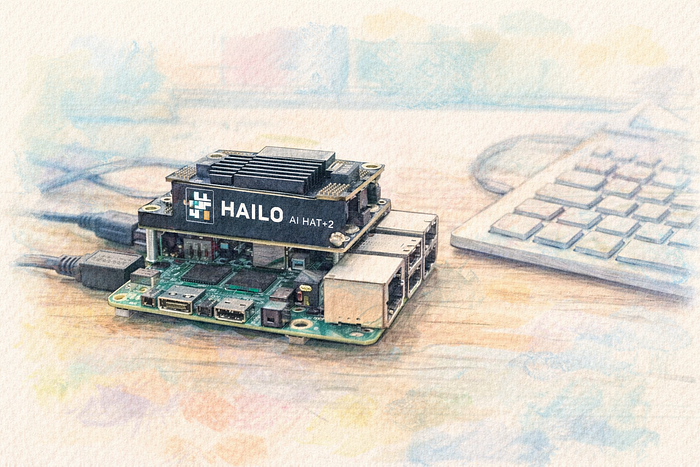
Running large language models locally used to mean a power-hungry desktop GPU and a fair amount of patience. With the Raspberry Pi 5 and the Raspberry Pi AI HAT+ 2 (Hailo-10H), that barrier is much lower. You can build a compact, low-power system that runs LLM inference entirely on your desk — or, in my case, on a TV stand.
This guide walks through setting up a fully local LLM environment on a Raspberry Pi 5 using Ubuntu Server 24.04, the Raspberry Pi AI HAT+ 2, Hailo's Ollama-compatible runtime, and OpenWebUI. By the end, you'll have a persistent system service that starts automatically at boot and exposes a browser-based chat interface powered completely by local hardware. The goal isn't to compete with data-center GPUs. It's to build a practical, private, always-on AI node that you control — something you can integrate into home automation, development workflows, or offline experimentation without relying on external infrastructure.
In the final setup, the architecture looks like this:
Browser
  ↓
OpenWebUI (systemd service, port 8080)
  ↓
hailo-ollama (systemd service, port 8000)
  ↓
/dev/hailo0
  ↓
Hailo-10H hardware accelerator
The main idea is to keep the stack native and persistent: no Docker, no manual launch steps after reboot, and as few moving parts as possible.
From "Build It From Scratch" to "Make It Stable"
The original plan was straightforward: run a fully local LLM on a Raspberry Pi 5 with Ubuntu and the AI HAT+ 2 using only native Linux components.
So I started the way many of us would: build everything manually.
That meant compiling the Hailo kernel driver against the running kernel, building the runtime libraries, and wiring the stack together piece by piece. In theory, this gives maximum control. In practice, it turned into a maintenance loop. Kernel module builds were sensitive to small changes — compiler versions, header mismatches, minor kernel updates. Fix one issue, hit the next. Even after the device showed up correctly as /dev/hailo0, the userspace runtime had to match the hardware generation exactly. Some versions detected the device but couldn't communicate with it properly. Others simply weren't packaged for Ubuntu yet.
At that point, the question wasn't "Can this work?" — it clearly could. The question was "Will this stay working?"
Instead of continuing to rebuild everything manually, I switched to using the Raspberry Pi repositories for the Hailo driver and runtime packages. Initially that felt like a compromise, since the base system is Ubuntu. But by limiting it strictly to the Hailo components, compatibility issues never surfaced. The difference was immediate:
- The kernel module loaded cleanly
- The runtime matched the hardware
- Models initialized straight away
- The inference server stayed stable across reboots
Building from source gives control, but using vendor-maintained packages gives stability. For this project, stability won — and that's what turned it from an experiment into a reliable, always-on local AI node.
Next, let's go over the installation steps one by one.
Note! At the time of writing, Raspberry Pi's official LLM setup guide for the AI HAT+ 2 references version 5.1.1 of the Hailo GenAI Model Zoo package. I used that same version here to stay aligned with the vendor documentation. Besides that, version 5.2.0 wasn't available in the official repo anyways.
Step 1. Install the Hailo Kernel Driver
The first step is getting the kernel-level pieces in place so Ubuntu can talk to the accelerator correctly. Since the required Hailo packages were available through the Raspberry Pi package repository, I added that repository and pinned it so only the Hailo-related packages would be pulled from there:
curl -fsSL https://archive.raspberrypi.com/debian/raspberrypi.gpg.key \
| sudo gpg --dearmor -o /usr/share/keyrings/raspberrypi-archive-keyring.gpg

echo "deb [arch=arm64 signed-by=/usr/share/keyrings/raspberrypi-archive-keyring.gpg] \
http://archive.raspberrypi.com/debian trixie main" \
| sudo tee /etc/apt/sources.list.d/raspberrypi.list
Then create an APT pinning file so Ubuntu does not start preferring Raspberry Pi packages for unrelated components:
nano /etc/apt/preferences.d/raspberrypi-pin

Package: *
Pin: origin archive.raspberrypi.com
Pin-Priority: 1

Package: h10-hailort-pcie-driver hailort hailort-* libhailort* hailo*
Pin: origin archive.raspberrypi.com
Pin-Priority: 1001
With that in place, install the kernel driver and matching kernel headers:
sudo apt update
sudo apt install h10-hailort-pcie-driver linux-headers-$(uname -r)
To verify that the device is visible to the system, check for the Hailo device node:
ls -l /dev/hailo*

crw-rw-rw- 1 root root 234, 0 Feb 24 23:00 /dev/hailo0
If /dev/hailo0 is present, the kernel side of the setup is in good shape.
Step 2. Install the Hailo Runtime
Once the driver is loaded and the device is exposed, the next layer is the Hailo runtime itself. This is what allows user-space applications to communicate with the accelerator properly. Install the Hailo-10H runtime:
sudo apt install h10-hailortThen verify that the runtime can talk to the hardware:
hailortcli fw-control identifyThe output should include something along the lines of:
Firmware Version: 5.1.1
Device Architecture: HAILO10H
This is an important checkpoint. At this stage, the hardware is not just detected by Linux — it is actually responding correctly through the runtime stack.
Step 3. Install the Hailo Ollama Runtime
With the low-level pieces working, the next step is the inference layer. In this setup, that role is handled by hailo-ollama, which exposes an Ollama-compatible API server. Install the model zoo package:
wget https://dev-public.hailo.ai/2025_12/Hailo10/hailo_gen_ai_model_zoo_5.1.1_arm64.deb
sudo dpkg -i hailo_gen_ai_model_zoo_*.deb
After installation, verify that the API is responding:
curl http://localhost:8000/hailo/v1/listIf everything is working, you should get a JSON response listing the available models:
{"models":[...]}At that point, the backend inference service is up and ready.
Step 4. Install and configure OpenWebUI
For the frontend, I wanted a simple web interface without introducing containers, so OpenWebUI was installed directly into its own Python virtual environment.
First, create a dedicated service user:
sudo useradd -r -m -d /opt/openwebui -s /usr/sbin/nologin openwebuiThen switch to that user and install OpenWebUI inside a virtual environment:
sudo -u openwebui bash
cd /opt/openwebui
python3 -m venv venv
source venv/bin/activate
pip install open-webui
exit
Keeping OpenWebUI under its own system user makes the setup cleaner and easier to manage later.
Next, create a small environment file for OpenWebUI:
nano /opt/openwebui/env

OLLAMA_BASE_URL=http://localhost:8000
WEBUI_AUTH=False
The important part here is OLLAMA_BASE_URL=http://localhost:8000, which points OpenWebUI at the local hailo-ollama service.
Step 5. Create a systemd Service for Hailo Ollama
The inference service also needs to start automatically, so create a systemd unit:
nano /etc/systemd/system/hailo-ollama.service

[Unit]
Description=Hailo Ollama Service
After=network.target

[Service]
Type=simple
ExecStart=/usr/bin/hailo-ollama serve
Restart=always

[Install]
WantedBy=multi-user.target
Enable and start it:
sudo systemctl daemon-reload
sudo systemctl enable hailo-ollama
sudo systemctl start hailo-ollama
Step 6. Create a systemd Service for OpenWebUI
To make the web interface persistent across reboots, create a systemd service:
nano /etc/systemd/system/openwebui.service

[Unit]
Description=OpenWebUI Service
After=network.target hailo-ollama.service
Wants=hailo-ollama.service

[Service]
Type=simple
WorkingDirectory=/opt/openwebui
EnvironmentFile=/opt/openwebui/env
ExecStart=/opt/openwebui/venv/bin/open-webui serve --host 0.0.0.0 --port 8080

Restart=always
RestartSec=3

[Install]
WantedBy=multi-user.target
Then reload systemd, enable the service, and start it:
sudo systemctl daemon-reload
sudo systemctl enable openwebui
sudo systemctl start openwebui
With both services enabled, the system comes back up cleanly after a reboot and restores the full local LLM stack automatically.
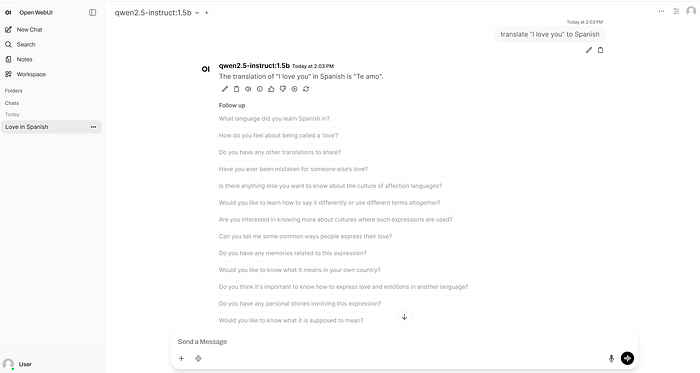
Step 7. Access the Web UI
Finally, once both services are running, open a browser and connect to:
http://<raspberry-pi-ip>:8080If the backend is reachable, the models should appear automatically in OpenWebUI and the system is ready to use.
Final Thoughts
The Raspberry Pi 5 and AI HAT+ 2 can absolutely be turned into a fully local LLM appliance, and that alone is impressive. But getting there is still more about careful integration than plug-and-play simplicity. Once the stack is stable, it is neat, quiet, and self-contained — but the performance is still limited, with relatively slow generation and a narrow practical model range. So, don't expect it to be your "ChatGPT replacement" quite yet.
The bigger issue is software support — especially outside of Raspberry Pi OS. Raspberry Pi launched the AI HAT+ 2 in January 2026, yet its official documentation still references GenAI package version 5.1.1, while Hailo's own ecosystem already points to 5.2.0 support for Hailo-10H. For a product aimed at local AI on the Pi, that lag is hard to ignore. Especially, combined with the fact that some of the models were replaced — most notably Llama-3.2–3B-Instruct model. It does not break the project per se, but it does make the platform feel immature — and it makes the buying decision harder to justify unless you specifically enjoy working through rough edges. For hobbyists who like experimenting, it is interesting. For anyone expecting a polished out-of-the-box local LLM platform, it is probably not there yet.